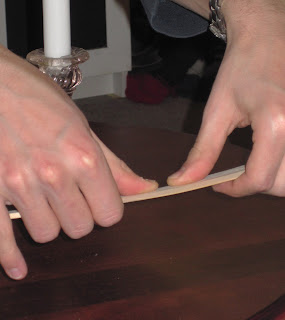
First I had to get two thin pieces of wood (1/8" thickness works best) by 1 1/2" by 2 ft. Unfortunately, I didn't have any sitting around this past weekend... but I really really wanted to try this out. So, I carefully rip-sawed two pieces of 1 1/2" by 1/2" pine. It was an annoying process, just look at the setup:

...but alas, after 30 minutes or more of fiddling, I had two pieces of wood with the right dimensions. If I hadn't been so hasty, I could have just gotten some scraps from Lowe's or Home Depot (yeah, they give that stuff away), although you should make sure you're getting pine, or at least something not too heavy. By the way, apparently balsa-wood won't work well for boomerangs--it's actually too light!
Anyway, on to the tools. You will at least need a very sharp knife and a drill (later) to do this, but a few other tools are nice to have. I found this weird chisel-like tool at a barn sale last week (center-left below), but everything else I had already. The clamps are nice to have when you're whiddling away, and some sort of measurement tool helps. The wood-gouging tools are useful for lightening the boomerang, but you may find out you don't need them.

So, the directions say that a tapered edge toward from the "spinning direction" is usually added. Since this is a right-handed boomerang, the spinning direction is counter-clockwise. I marked a rough tapered edge and wrote "top" on the correct side so I wouldn't get confused at the later step when I whiddle the wing (although, I actually completely messed this up and got it backwards in the end anyway!... I hope it won't change the outcome too much.)

I cut this first tapered edge away using a utility knife, but anything should work. In all honesty, this is the easiest part by far. Once finished with the first taper, I traced it onto the other board and kept working through all of them until they were finished. Now we begin to get to the interesting stuff...
It is very crucial that you now balance the sticks. In other words, because of my poor manufacturing of the sticks, one end is likely heavier than the other. So, just find the center by balancing it on your finger (or even better, the eraser on the end of a pencil) and mark it. Next, measure 1-inch in each direction and draw lines perpedicular to the length of the stick (see below).

You can see the tapered edge I made in this next picture.

I gouged out the back using a gouging tool. I'm not really sure if it is necessary. I made gouges approximately 2 inches long in sets of three across the entire underside of the sticks, except for the area where the sticks overlap.
After doing the cutting and gouging, I bent the sticks using a candle. You want to bend the sticks so that the boomerang has a low center of gravity. This will ensure stable flight. I heated each stick approximately 1/3 from the center to each edge over a candle for about 20-30 seconds. I then immediately pulled it away from the candle and put a slight upward bend into it. It took a while to get it right, and nothing caught on fire. It's pretty foolproof.
Here you see one of the sticks bent on both sides. I'm not sure what the angle is, but each end is raised around 1/2" on a flat surface.
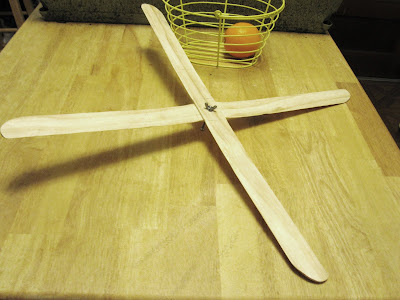
I drilled a hole in the centers of each stick (marked earlier) for a 6-32 bolt. It doesn't matter what size you use, but try to keep it small. The bolt was around 1.5" long with both a standard nut and a wingnut. The excess length of the bolt allows you to catch it in flight as it comes back toward you, and the wingnut lets you tighten the bolt when it becomes loose.
And here is the finished product! It flies great even though I have the directionality backwards. I did paint it, but I was not able to take a picture before giving it to my younger brother as a gift.